Shalinn Tan Jiawen
Taylor's University Lakeside Campus
School of Architecture, Building and Design
Bachelor of Science(Hons) in Architecture
Semester 3
Computer Applications
[CSC60503]
Project 2A: Still Rendering With Materials, Lights, Camera Views and Site Context
The objectives of this project is so that students are able to learn the basics of materials, lighting, camera views, and post production tools. Students must first learn to import .dwg files into 3ds Max and manage the scenes using layers. It also teaches students the methods to create materials and use lights and cameras in 3ds Max. Another objective is to help students understand the execution of appropriate rendering settings and enhance the visual outcome of the renderings using post-production tools such as Photoshop. Upon completing this project, I learnt to use various softwares and also obtained new techniques and methods in Pre and Post Production tools. It was an eye opening experience.

This is done by first saving the file as an .igs file first, and then importing it in via 3ds Max.

This is done by first saving the file as an .igs file first, and then importing it in via 3ds Max.

How the file looks like after being successfully imported into 3ds Max

How the file looks like after being successfully imported into 3ds Max

First of all I tried to make the terrains by using Rhino. I did it by first drawing out the contour lines and setting them to their preferred heights. Then using the command "Patch" I managed to create the realistic terrains. However, the problem with this is that I did not know how to remove the terrains that were getting in the way of my interior, and I took the whole day to experiment on various methods. I found out one method, which is using the Grasshopper command, but there was no time.

First of all I tried to make the terrains by using Rhino. I did it by first drawing out the contour lines and setting them to their preferred heights. Then using the command "Patch" I managed to create the realistic terrains. However, the problem with this is that I did not know how to remove the terrains that were getting in the way of my interior, and I took the whole day to experiment on various methods. I found out one method, which is using the Grasshopper command, but there was no time.

In the end, after a whole day of experimenting on Rhino, I decided to use 3ds Max to create the site terrains instead. This is done by using "Box" and segmenting it into many segments, and then by using the "Polygon" method to set the shape of the terrain. After that, the edges of the terrains were smoothened out using the "Turbosmooth" command.

In the end, after a whole day of experimenting on Rhino, I decided to use 3ds Max to create the site terrains instead. This is done by using "Box" and segmenting it into many segments, and then by using the "Polygon" method to set the shape of the terrain. After that, the edges of the terrains were smoothened out using the "Turbosmooth" command.

I realised that my imported .igs file had a problem whereby my building is a whole component and not made up of separate components ie windows and walls. Therefore I imported the file to 3ds Max using .sat file. This is how it looks like imported as a .sat file in 3ds.

I realised that my imported .igs file had a problem whereby my building is a whole component and not made up of separate components ie windows and walls. Therefore I imported the file to 3ds Max using .sat file. This is how it looks like imported as a .sat file in 3ds.

Next, I added my materials into the library and made them look more realistic by using the "Bump", "Reflection" and "Glossiness" settings in respective ranges for each material.

Next, I added my materials into the library and made them look more realistic by using the "Bump", "Reflection" and "Glossiness" settings in respective ranges for each material.

Then, I assigned the materials onto the buildings, and set them onto my building to look even more realistic by using UVW mapping and manipulating the size and position of the materials manually.

Then, I assigned the materials onto the buildings, and set them onto my building to look even more realistic by using UVW mapping and manipulating the size and position of the materials manually.

The adding of materials by stages. First the wall(as shown in screenshot). After that I added the materials for the windows, glasses and doors.

The adding of materials by stages. First the wall(as shown in screenshot). After that I added the materials for the windows, glasses and doors.

After adding the mkaterials to the building, I drew a box at the bottom of the building so that it is easy to check if the building is in one plane. Then I added the contour into the viewport again.

After adding the mkaterials to the building, I drew a box at the bottom of the building so that it is easy to check if the building is in one plane. Then I added the contour into the viewport again.

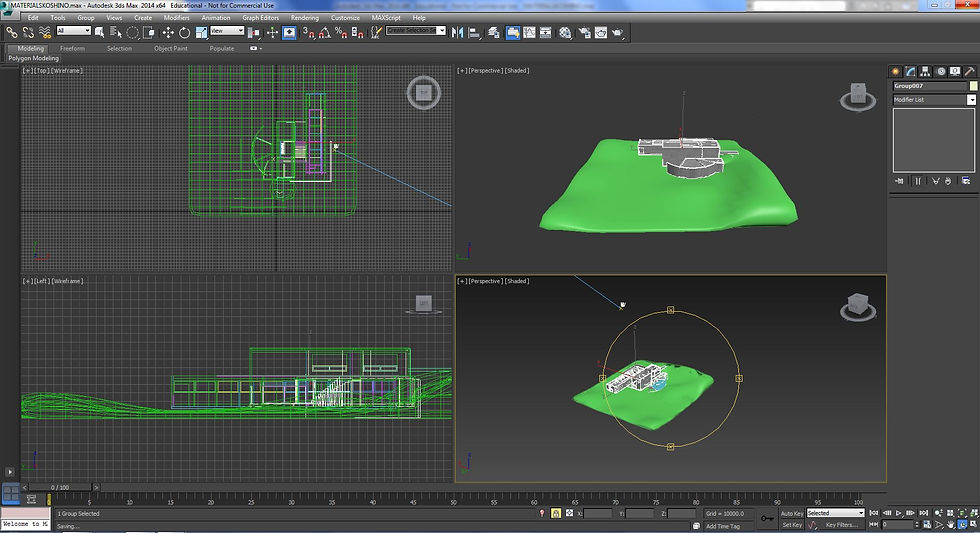
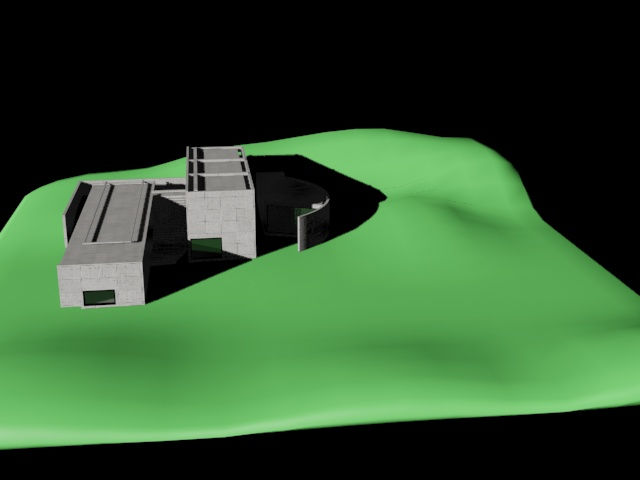
Then I arranged the building on the site terrains and this is the final look. Then I rendered my building so that it looks even more realistic.

Then I arranged the building on the site terrains and this is the final look. Then I rendered my building so that it looks even more realistic.

The Daylight was also brought in together with 2 cameras(1 eyeview and 1 bird's eye view) for a better view of the rendering.

The Daylight was also brought in together with 2 cameras(1 eyeview and 1 bird's eye view) for a better view of the rendering.
Rendered Views
(Before Photoshop)
EYEVIEW AND BIRD'S EYE VIEW PERSPECTIVE

Without Background

Without Background

Without Background

Without Background

Without Background

Without Background


With added grass (using Hair and Fur generator) -not completed rendering-
Final Render Product (With Photoshop)
 |  |
|---|
